Viking ovens offer a self-cleaning feature for easy maintenance. The process involves high temperatures to burn off food residue. Before starting‚ remove racks and accessories. The cycle lasts 3-4 hours.
Overview of Viking Oven Self-Cleaning Feature

The self-cleaning feature on Viking ovens provides a convenient method for maintaining a clean oven interior without the need for manual scrubbing. This system employs a high-temperature cycle to incinerate food residue and spills‚ reducing them to ash. Viking ovens are designed with a pyrolytic self-cleaning cycle‚ which heats the oven to temperatures as high as 750°F (399°C) to effectively vaporize and eliminate food particles. During this process‚ an integral smoke eliminator works to minimize odors typically associated with the burning of food residue. The duration of the self-clean cycle can vary‚ generally lasting between 3 to 4 hours‚ depending on the oven model and the level of soiling. After the high-temperature cleaning phase‚ there is a cool-down period‚ usually around 30 minutes‚ before the oven door can be opened. The self-cleaning function is intended for deep cleans when the oven has a significant buildup of baked-on grime. This feature contributes to the longevity and performance of the oven‚ preventing potential fire hazards from accumulated food debris. It’s an essential component of maintaining a Viking oven in optimal condition‚ offering a blend of convenience and efficiency for the home chef;
Preparing the Oven for Self-Cleaning
Before initiating the self-cleaning cycle on your Viking oven‚ careful preparation is essential to ensure optimal results and prevent any potential damage. The first and foremost step is to remove all oven racks‚ broiler pans‚ broiler grids‚ and any other utensils or accessories from inside the oven. These items are not designed to withstand the high temperatures reached during the self-clean cycle and could become warped or discolored. Additionally‚ it’s important to manually remove any large pieces of food debris or excessive spills from the oven floor to minimize smoke and odor during the cleaning process. While not always necessary‚ wiping down the interior with a damp cloth can also help reduce residue. Ensure that all controls are in the OFF position before proceeding. It’s crucial not to use your oven to clean other parts or items. Avoid lining the oven cavity with foil or any other materials‚ as this can interfere with the self-cleaning process and potentially damage the oven’s interior. By taking these preparatory steps‚ you can ensure that the self-cleaning cycle operates efficiently and safely‚ leaving your Viking oven sparkling clean and ready for your next culinary creation. Remember to consult your oven’s user manual for specific instructions and recommendations.
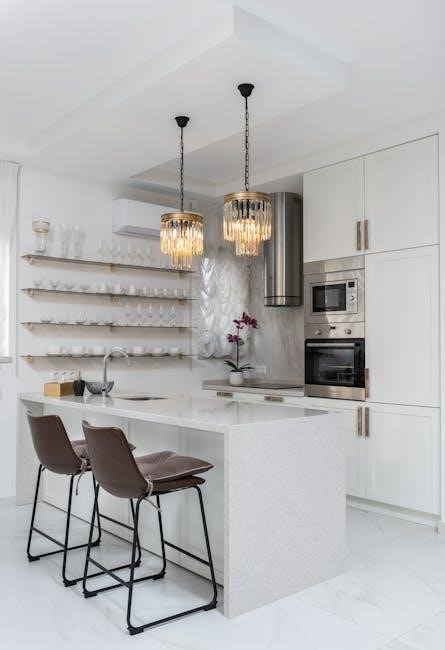
Removing Racks and Accessories
Prior to initiating the self-cleaning cycle of your Viking oven‚ it is imperative to meticulously remove all racks and accessories from the oven’s interior. This step is crucial for several reasons‚ primarily to prevent damage to these components and to ensure the effectiveness of the self-cleaning process. Oven racks‚ especially those with a TruGlide feature‚ and other accessories such as broiler pans and grids‚ are not designed to withstand the extreme temperatures reached during the self-clean cycle‚ which can reach up to 750°F. Exposure to such high heat can cause warping‚ discoloration‚ or other forms of damage‚ potentially rendering them unusable. Furthermore‚ leaving these items inside the oven during the self-clean cycle can hinder the oven’s ability to thoroughly clean all surfaces‚ as they may block the heat from reaching certain areas. Additionally‚ any food residue or grease accumulated on the racks and accessories can contribute to increased smoke and odor during the cleaning process. Therefore‚ before starting the self-clean cycle‚ carefully remove all racks‚ broiler pans‚ broiler grids‚ and any other accessories. Set them aside and‚ if desired‚ clean them separately using appropriate cleaning methods recommended by the manufacturer. Once the self-clean cycle is complete and the oven has cooled down‚ you can then replace the clean racks and accessories. This ensures both the longevity of your oven components and the optimal performance of the self-cleaning function.
Initiating the Self-Clean Cycle
Once you’ve meticulously prepared your Viking oven by removing all racks and accessories‚ you’re ready to initiate the self-clean cycle. The process for starting the self-clean cycle may vary slightly depending on your specific Viking oven model‚ so it’s crucial to consult your owner’s manual for precise instructions. However‚ a general guideline typically involves the following steps. First‚ ensure that the oven door is completely closed and securely latched. Many Viking ovens feature an automatic door lock that engages during the self-clean cycle for safety reasons. Next‚ locate the control panel on your oven. Look for the “Self-Clean” or “Clean” button or setting. Depending on the model‚ you might need to press this button directly or select it from a menu using a dial or touchpad. After selecting the self-clean option‚ you may be prompted to choose the cleaning duration. Some Viking ovens offer options for light‚ medium‚ or heavy cleaning‚ which will adjust the length of the cycle accordingly. If your oven doesn’t provide these options‚ it will likely have a preset cleaning time. Once you’ve selected the desired cleaning duration‚ press the “Start” or “OK” button to begin the self-clean cycle. The oven will then start heating up to extremely high temperatures‚ typically around 750°F‚ to burn off any food residue. During this process‚ the oven door will remain locked for safety. It’s essential to avoid opening the door while the self-clean cycle is in progress. The control panel will usually display a countdown timer or an indicator light to show that the self-clean cycle is active. Once the cycle is complete‚ the oven will automatically shut off and begin to cool down. The door will remain locked until the oven has cooled to a safe temperature.
Duration of the Self-Clean Cycle
The duration of the self-clean cycle on a Viking oven is an important factor to consider when planning your cleaning schedule. The exact length of the cycle can vary depending on several factors‚ including the specific model of your Viking oven and the level of soil or residue inside the oven cavity. Generally‚ you can expect a self-clean cycle to last anywhere from 2 to 4 hours. Some models may offer different cleaning options‚ such as a light clean‚ a medium clean‚ or a heavy clean‚ which will affect the duration accordingly. For instance‚ a light clean might take around 2 hours‚ while a heavy clean could last up to 4 hours. In addition to the actual cleaning time‚ it’s also essential to factor in the cool-down period. After the self-clean cycle is complete‚ the oven needs to cool down to a safe temperature before the door can be unlocked and opened. This cool-down period can typically add another 30 minutes to an hour to the overall process. Therefore‚ if you’re planning to use your oven shortly after cleaning‚ it’s crucial to account for both the cleaning duration and the cool-down time. It’s always best to consult your Viking oven’s owner’s manual for the most accurate information regarding the self-clean cycle duration for your specific model. The manual will provide detailed instructions and guidelines‚ including any recommended cleaning times for different levels of soiling. Keep in mind that attempting to shorten the self-clean cycle or interrupting it prematurely can potentially damage the oven or affect its cleaning performance. It’s best to allow the cycle to run its full course to ensure optimal results and maintain the longevity of your appliance.
What to Expect During the Self-Clean Cycle
During the self-clean cycle of your Viking oven‚ you can anticipate several occurrences as the appliance works to remove built-up grime and food residue. Firstly‚ the oven will reach extremely high temperatures‚ typically around 750 degrees Fahrenheit. This intense heat is necessary to incinerate the soil and turn it into ash; As the oven heats up‚ you’ll notice the door automatically locks‚ preventing it from being opened until the cycle is complete and the oven has cooled down sufficiently. This safety feature is essential to prevent burns and injuries. You might also observe some smoke and odor emanating from the oven during the self-clean cycle; This is a normal part of the process‚ as the high heat breaks down the food particles. However‚ it’s a good idea to ensure proper ventilation in your kitchen by opening windows or turning on the range hood. The intensity of the odor can vary depending on the amount of soil in the oven. In some cases‚ you may also hear the oven’s cooling fan running to help regulate the temperature. The fan will typically continue to run even after the self-clean cycle is finished until the oven has cooled down. It’s important to avoid touching the exterior of the oven during the self-clean cycle‚ as it can become very hot. Keep children and pets away from the appliance to prevent accidental burns. Once the self-clean cycle is complete‚ the oven will begin to cool down gradually. The door will remain locked until the temperature has dropped to a safe level. The cool-down period can take anywhere from 30 minutes to an hour‚ depending on the model and the ambient temperature. After the cool-down period‚ the door will unlock automatically‚ and you’ll be able to open the oven and wipe away any remaining ash with a damp cloth. Remember to consult your Viking oven’s owner’s manual for specific instructions and safety guidelines related to the self-clean cycle.
Odor and Smoke Considerations
When operating the self-clean cycle on your Viking oven‚ it’s essential to be aware of the potential for odor and smoke. As the oven reaches extremely high temperatures to burn off food residue‚ some amount of smoke and odor is almost inevitable. The intensity of the odor and smoke can vary depending on several factors‚ including the amount of soil in the oven‚ the type of food residue‚ and the ventilation in your kitchen. Generally‚ the more food buildup‚ the stronger the odor and smoke will be. To minimize these effects‚ ensure your kitchen is well-ventilated during the self-clean cycle. Open windows and turn on the range hood to help dissipate the smoke and odors. If you have a particularly sensitive respiratory system‚ consider leaving the house while the self-clean cycle is in progress. It’s also a good idea to remove any pets‚ especially birds‚ from the kitchen area‚ as they can be more susceptible to the effects of smoke and fumes. In some cases‚ the odor may be quite strong and linger for several hours after the self-clean cycle is complete. To help reduce the lingering odor‚ you can place a bowl of vinegar or baking soda inside the oven after it has cooled down. These substances can help absorb and neutralize the odor; If you notice excessive smoke or a burning smell during the self-clean cycle‚ immediately turn off the oven and ventilate the kitchen. Check for any large pieces of food or debris that may be causing the issue. Once the oven has cooled down‚ remove the debris and try running the self-clean cycle again. It’s important to remember that some odor and smoke are normal during the self-clean cycle‚ but excessive amounts could indicate a problem. Always consult your Viking oven’s owner’s manual for specific instructions and safety guidelines related to odor and smoke considerations.
Post Self-Clean Cycle Procedures
Once the self-clean cycle of your Viking oven has completed‚ it’s crucial to follow specific post-cycle procedures to ensure safety and maintain the oven’s cleanliness. After the cycle finishes‚ the oven will automatically begin its cool-down phase‚ which can last for approximately 30 minutes to an hour‚ depending on the model. During this time‚ the oven door will remain locked‚ and you should not attempt to open it. Once the oven has cooled sufficiently‚ the door will unlock automatically‚ signaling that it’s safe to open. Before opening the door‚ allow the oven to cool down completely to avoid any risk of burns. Even after the door unlocks‚ the oven surfaces may still be hot. Once the oven is cool‚ open the door carefully and inspect the interior. You’ll likely find a fine layer of ash residue coating the surfaces. This is the result of the burnt-off food particles. Using a damp cloth or sponge‚ gently wipe away the ash from the oven walls‚ floor‚ and door. Avoid using abrasive cleaners or scrub pads‚ as these can damage the oven’s interior finish. For stubborn residue‚ you can create a paste of baking soda and water and apply it to the affected areas. Let it sit for a few minutes before wiping it away. After cleaning the interior‚ replace the oven racks and any other accessories you removed before the self-clean cycle. Ensure they are properly positioned and securely in place. Finally‚ give the exterior of the oven a wipe down with a clean‚ damp cloth to remove any fingerprints or smudges. Once you’ve completed these post-cycle procedures‚ your Viking oven should be clean and ready for its next use. Remember to consult your oven’s owner’s manual for any specific instructions or recommendations related to post-self-clean cycle procedures. Always prioritize safety and follow the manufacturer’s guidelines to ensure optimal performance and longevity of your appliance.
Cool Down and Unlocking the Door
After the self-clean cycle of your Viking oven concludes‚ the cool-down process begins automatically. This phase is crucial for safety and to prevent damage to the oven components. During the cool-down period‚ the oven door remains locked‚ and it’s imperative not to force it open. The duration of the cool-down can vary depending on the specific Viking model and the selected self-clean cycle length‚ typically ranging from 30 minutes to an hour. The oven employs a safety mechanism that keeps the door locked until the internal temperature reaches a safe level. This prevents accidental burns that could occur if the door were opened prematurely while the oven is still extremely hot. The oven’s control panel will usually display a message indicating that the cool-down is in progress. Once the oven has cooled sufficiently‚ the door will unlock automatically. You’ll typically hear a click or see a notification on the display signaling that the door is now accessible. Before opening the door‚ it’s advisable to allow the oven to cool down completely‚ even after the door unlocks. This ensures that the internal surfaces are no longer dangerously hot‚ minimizing the risk of burns. Once you’re confident that the oven has cooled down‚ carefully open the door and inspect the interior. Be prepared to find a layer of ash residue‚ which is the byproduct of the self-cleaning process. This ash can be easily wiped away with a damp cloth or sponge. Remember‚ patience is key during the cool-down phase. Do not attempt to override the locking mechanism or force the door open‚ as this could damage the oven and potentially cause injury. Always refer to your Viking oven’s user manual for specific instructions and safety guidelines related to the cool-down and unlocking process. Following these guidelines will ensure a safe and effective self-cleaning experience.
Troubleshooting Common Issues
Encountering issues during or after a Viking oven’s self-clean cycle can be frustrating‚ but many problems have simple solutions. One common issue is the oven door remaining locked after the cycle completes. This often occurs if the oven hasn’t cooled down sufficiently. Ensure ample time has passed; some models require up to an hour for complete cooling. If the door remains locked‚ try turning the oven off at the breaker for a few minutes‚ then turning it back on. This can reset the control system. Another frequent problem is excessive smoke or odor during the self-clean cycle. This is usually caused by large amounts of food residue. For best results‚ thoroughly clean any significant spills or debris before initiating the cycle. Ensure proper ventilation by opening windows and turning on the kitchen exhaust fan. Incomplete cleaning is another concern. If residue remains after the cycle‚ it could indicate an issue with the oven’s temperature sensor or heating element. Check the sensor’s connection and consider having a qualified technician inspect the heating element. Error codes displayed on the control panel can provide valuable clues. Consult your Viking oven’s user manual for a list of error codes and their corresponding solutions. If the self-clean cycle fails to start‚ verify that the oven door is fully closed and locked. Some models have a door switch that prevents the cycle from starting if the door isn’t properly secured. If none of these steps resolve the issue‚ it’s best to contact a qualified appliance repair technician. Attempting to repair complex oven components yourself can be dangerous and may void your warranty. Remember to provide the technician with your oven’s model number and a detailed description of the problem. By systematically troubleshooting common issues‚ you can often resolve minor problems and avoid unnecessary service calls.